Image Map
Showing posts with label baking. Show all posts

Sunday, November 16, 2014

Spiced Pumpkin Brittle

Promised you all this recipe last week,
so here it is....

Spiced Pumpkin Brittle

Ingredients:
  • 1 1/2 cups of pumpkin seeds, plus a handful more for dipping
  • 1/2 cup of water
  • 1/2 cup of light corn syrup
  • 1 cup of granulated sugar
  • 1/2 teaspoon of baking soda
  • 1 tablespoon of pure vanilla extract
  • 1 tablespoon of unsalted butter
  • 1/4 teaspoon of ground cloves
  • 1/4 teaspoon of ground allspice
  • 1/4 teaspoon of ground nutmeg
  • 1 teaspoon of ground cinnamon
  • 1 1/2 cups of semi sweet chocolate chips


Directions:
1. First, toast the pumpkin seeds over medium heat in a pan. Keep the seeds moving so they don’t burn and stop toasting once they start to tan and you can smell the toasted seeds.
2. Prepare a baking sheet lined with parchment paper or a silpat. In a medium saucepan clipped with a candy thermometer (make sure it doesn’t touch the bottom of the pan), heat water, sugar and corn syrup over medium high heat stirring constantly with a wooden spoon until it starts to boil. Stop stirring and let the mixture boil until it reaches 285 degrees. You may have to turn the heat up to high if the temperature isn’t increasing.
3.Stir in the pumpkin seeds and continually stir the mixture so it doesn’t stick to the bottom until the temperature reaches 300 degrees. Remove from the heat and stir in all the spices, vanilla extract, baking soda and butter, just until combined. The baking soda will cause it to bubble up a bit, but that’s normal.
4. Working quickly, pour the mixture over the baking sheet and using the back of a wooden spoon spread across the sheet evenly. Allow the brittle to harden completely at room temperature, or if you’re in a rush, pop it in the refrigerator for about a half hour or until completely hardened.
5. Break the brittle into random irregular shapes.
6. Temper the chocolate chips to dip the brittle into. 
7. Finely chop a large handful of raw pumpkin seeds and place on a dish.  After dipping the brittle in the chocolate, dip the ends in the raw pumpkin seeds and sprinkle with some sea salt. 
8. To package them for gifts, place them in a box lined with parchment paper.  Place a sheet of parchment between each brittle to ensure they don’t stick together.
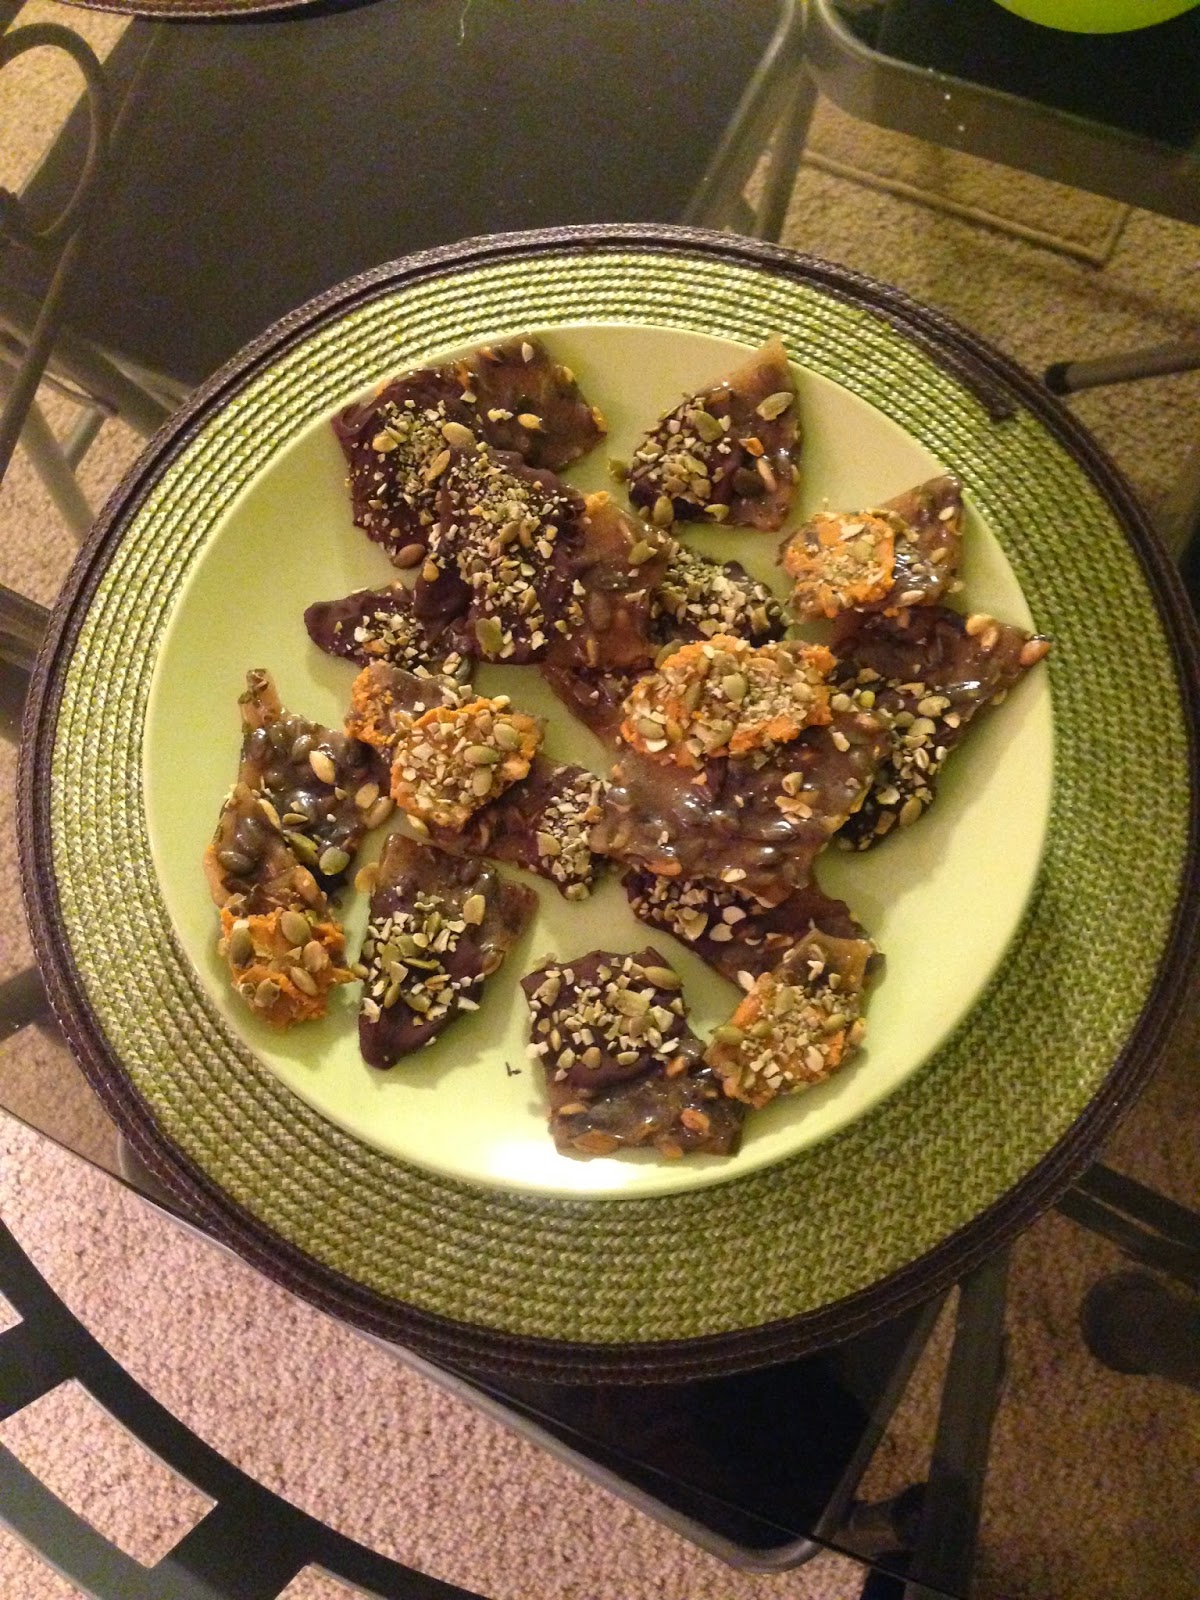
Let me know if you guys have any questions
--its a fairly easy recipe just make sure you
 get the corn syrup, sugar, water to the proper temperature
or it won't get to that crack candy state 
and you will have taffy instead of brittle!

xo,
Rach

Recipe from Honestly Yum.

Wednesday, February 12, 2014

Roses are Red, Cake Pops are Pink

Really enjoyed making these 
Sweetheart Cake Pops!


After all, it's an opportunity to not only 
brush up on my baking skills but also
to hang with the girls.

We had so much fun decorating them,
we wish we made more pops!


You can find this silicone heart tray at Michaels.

These are the kind of nights that I cherish
and hold dear to my heart.

Good, clean fun
with some wonderful woman!

You can find the recipe here.
If I can give you one baking tip,
it's to use the photo just as a source of inspiration -
don't be controlled by it or let it box you in.

I used to get upset when my baking creations
didn't turn out exactly like the picture.


The message is: 
Life isn't picture perfect.
Go with the flow, and find your own original.
The end result is so much more beautiful.


P.S Oh, and one more chocolate dipping secret I just remembered,
and wish I knew prior to this recipe because it would have
made my life a lot easier and saved a lot of previous cake pop casualties.
(Yes, there is such a thing. I can attest to it.)

Secret: Add one tsp of vegetable or canola oil to
 your baking chocolate during the melting process.
Its pure dipping perfection.

xo,

Monday, December 23, 2013

5 homemade gifts from the heart

With Christmas right around the corner,
and the holiday shopping frenzy in full swing --
you might really be feeling the affects of 
buyers remorse. 

While it feels good to give to others,
a lot of us take ourselves broke in the process.
If you are looking for last minute,
inexpensive homemade gifts from the heart - 
look no further.

I have 5 ideas for you that 
not only won't break the bank,
but will show your loved ones you put
a little extra, tender love and care into their 
special gift.

Check out these D.I.Y (Do It Yourself)
Gift Ideas....


I think these are so cute and easy.
All that's needed for this simple project 
are some hangers from the Dollar Store which come
(8) to a pack, and some fabric scraps from
 a local craft store (Joanne Fabrics).
 I cut the fabric into strips and using a glue gun, 
wrap them around the hangers until they are covered.
Decorate as you please with bows and ribbons
(Dollar Store has these as well).
All my friends love them! :)


You can use products found around your home to make
these delicious homemade scrubs. Sugar scrubs
are great exfoliators for the face and body this time
of year when skin tends to dry out.
Check out these fabulous DIY scrubs

3. Scarf


Put your hands to good use and knit or crochet
something warm for your loved one this holiday.
Don't know how? 
Michael's (as well as local yarn/craft shops) offer classes 
or YouTube provides great tutorials to get you
started with basic stitches.
 A simple scarf will take you under 3 hours 
to create and makes the perfect cozy Christmas gift!

4. Crafty Paint Calendar


Came across this little project and loved the idea.
Using paint color samples from Home Depot, Lowe's, etc
you can create a customized calendar.
Place an inexpensive frame over it
 (you can find them for under $5)
and use a dry erase marker to change
the month and days. 

5. Baking


Sometimes the best gifts are the ones that can be consumed!
 Head over to Trader Joe's for
some gingerbread mix and bake some fresh
gingerbread for friends and family!
Presentation is everything...so all it takes
are some adorable little tins to present something
freshly baked in that makes all the difference.
I found these cute ones for $1 at Christmas Tree Shop!
Gingerbread not your thing?
How about these adorable melting snowmen cookies
I made last night?

Hope I've given you some good ideas...
feel free to share your own! 

xo,

Sunday, December 22, 2013

From Rachel's Kitchen: "Meltworthy" Cookies!

I stalk, I mean, ehh hem "frequent"
Better Homes & Gardens magazine and website
always looking for the latest in home decor,
entertaining, and recipes. 

I came across this recipe for
"Chocolatly Melting Snowmen"
a couple of weeks ago and couldn't resist.
How cute are these little melting snowmen?

Equal parts adorable and delicious,

the cookie underneath is chocolate peanut butter
topped with vanilla melted chocolate, a peanut butter cup hat,
dark chocolate eyes, and a orange sprinkle nose!


The notion of melting snowmen saddens
 my heart a little, but when I look at these cookies
I can't help but think of the silly little snowman
singing his song "In Summer" in Frozen...


ha ha, I adored this song during the movie.
So cute!
...And then I'm reminded that Disney Princessses & Ice Queens
can do whatever they want in
 whimsical Disney animations like 'Frozen'
and that snowman don't have to melt because
 Disney Princesses/Queens can just award them
their own personal snow clouds in warmer temps...See?!
Instant Disney Solution, Problem Solved.
Disney movies just make life a happier place! :)

Anyways, what do you guys think of these?


You can find the same recipe from
 Better Homes & Gardens here.

To follow more of my baking adventures,
stop back regularly.

See you soon...

xo,

Monday, September 9, 2013

From Rachel's Kitchen: Cherry Lemonade Donuts


I've been trying to expand my dessert repertoire 
in an effort to prepare myself for the day I retire as a 
Domestic Goddess,
and donuts seemed promising.

Plus they are pink & cute,
so even if I did a crappy job executing the recipe,
I knew they would provide (at the very least),
 a few good Instagram photos.
ha ha

I had asked for a donut pan for my birthday,
and it was begging to be used.

I fell in love with this recipe
and decided before summer was over and
 Cherry Lemonade donuts would no longer be in fashion, 
I better put some fire behind my caboose.

They turned out really cute!

Here is the recipe....

Cherry Lemonade Donuts:

Ingredients:

(For Donuts)
1. 1/2 cup, unsalted butter - room temp
2. 1 cup granulated sugar
3. Zest of 1 lemon
4. 2 eggs
5. 1/2 cup of cherry juice (depit cherries and use a blender or juicer - then strain)
6. 1.5 cups of flour
7. 1 tsp baking powder
8. 1 tsp salt

(For Frosting)
1. 3 tbsp fresh lemon juice
2. 3 tbsp cherry juice (depit cherries and use a blender or juicer, then strain)
3. 1-2 cups of powdered sugar

Directions:

Note: Make sure you blend the cherry juice in right away and don't leave it oxidizing very long because it will turn dark brown and your donuts will not look very appealing!

1. Preheat oven to 400 degree. Butter and flour your donut pans and set aside. 
2. Cream the butter, sugar, and lemon zest until light and fluffy. Add eggs and blend until just incorporated. Mix in the 1/2 cup of cherry juice.
3.  In a separate bowl, whisk together the flour, baking soda, and salt. Then combine with the cherry mixture until the color is smooth.
4. Fill a large pastry bag with the donut mix and pipe is carefully into your greased donut pans, not filling it more than 2/3 of the way. You can use full size or mini donut pans- just make sure not to overfill because once your batter rises in the oven, your donuts will lack a donut hole. :)
5. Bake about 5 min for mini donuts, about 8-10 for full size - or until edges are a light golden brown.  You can always add them back to the oven, but once you burn them - there is no going back, so babysit them! Allow them to cool in the pan a minute or two before flipping them over -but they should pop right out. 
6. While they are cooling, in a small mixing bowl add the lemon juice, cherry juice, and 1 cup powdered sugar to start. If the consistency it too watery, add more powdered sugar. You want it thick enough so when you turn your donuts upside down and dip them - its thick enough to set and stay on top. 

They came out adorable!

Here are some photos of my sweet, little masterpieces!

Mini Cherry Lemonade Donuts

Full Size Donuts


My masterpiece...
BOOM!


These really were so delicious.

I had a few minis myself
(well -- I HAD to make sure they were EDIBLE!)
 and brought the rest downstairs to my tenants 
because we all know my butt doesn't need them!

Enjoy...

xo