Are these not the cutest ever?
c'monnn.


Cake pops are a whole lot easier with these buttons that you can now get in the supermarket – no more hunting down Wilton Candy Melts or having to colour your own chocolate – perfect pumpkin colour!
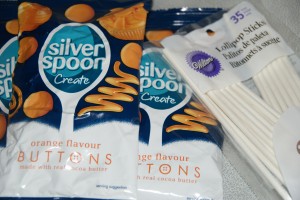
This is the recipe for cake pops I am using (Thanks JJ!)- but feel free to use your own:
You will need:
You will need:
- Cake Mix
- Cream Cheese Frosting
- Candy Melts (Orange)
- Lollipop Sticks
- Cookie Sheet
- Wax Paper
Cream Cheese Frosting:
- (2) 8 oz packages of soft cream cheese
- 1 stick of butter (soft)
- 1 tsp vanilla
- 1-2 Cups of Confectioners sugar
- 1-2 tbsp milk
Mix all together in mixer. Add one cup of sugar at first and add as you mix to desired taste.
Instructions:
- Bake Cake (Homemade or pre-mix)
- Let completely cool
- once cool crumble the cake into a bowl (really break it down)
- Add Cream Cheese frosting to the crumble (start with a handful and add as you go along). Mixing the crumble and frosting with your hands will allow you to feel the consistency.
- Pack into small ball shapes and place on wax paper and cookie sheet.
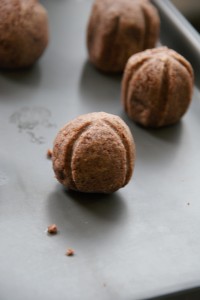
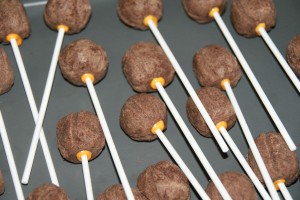
- Once chilled take one of the lollipop sticks and indent four grooves around each pumpkin cake ball. You can’t do this before chilling as it just smooshes the shape so press gently on the chilled ball as you don’t want to crack them.
7. Now melt up the chocolate – perfect pumpkin orange buttons courtesy of Silverspoon.
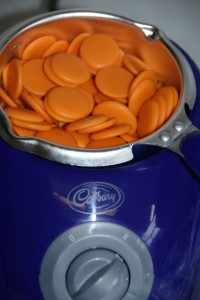
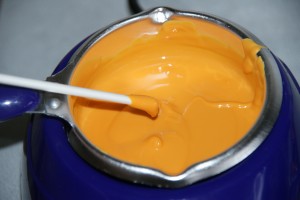
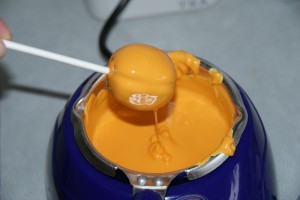
8. I’ve mentioned my chocolate melter before but it does make cake pops much easier – in they go, turn it on, 10 minutes lovely melted chocolate! If you’re melting in the microwave a small deep bowl will work the best, short 30 second bursts – you don’t want it to burn.
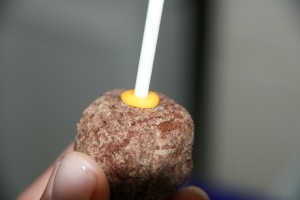
9. Take a stick and dip the end into the melted chocolate, push this into the base of the cake ball. The stick should go about ¾’s of the way into the ball.
10. Set it back onto the tray and repeat until all the balls are on the sticks.
11. Now you need to set yourself up with a cake pop stand – try an empty egg box tray it worked a treat for me. Set it onto a chopping board and then you’ll be able to move it easily. Punch holes through the tall spiky bits to post the cake pop sticks into. Punching the holes initially with a skewer is much easier than trying to do it with a lolly stick. If you buy your eggs from a farm shop or the like they will usually let you have a tray or two! Alternatively you could use a piece of polystyrene to hold them upright.
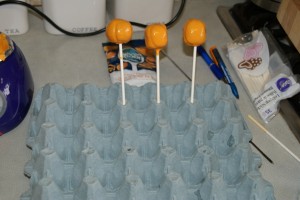
12.Okay cake pop stand done now take each pop in turn and dip it into the melted chocolate. Twirl the cake pop around as you take it out allowing the excess chocolate to drip away. This does take a bit of patience which is not something I have by the bucket load but it is worth taking your time.
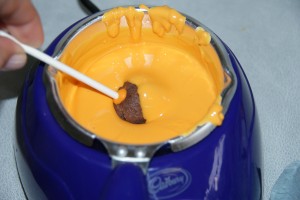
Once the excess has dripped away place the cake pop into your stand and move onto the next.
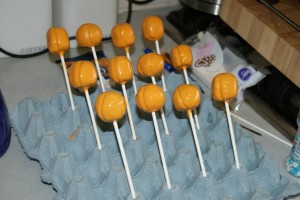
13. Once all the pumpkins are a lovely glossy orange allow the chocolate to set and dry. I didn’t want to put them in the fridge as sometimes I find they lose their shine so mine dried at room temp overnight.
14. Once they’re set and firm mix up a batch of royal icing – follow the directions on the box but go sparingly with the water, you need the royal icing thick enough to pipe and stay in shape.
15. Split the icing into three, one portion remains white and can be added to a piping bag right away. The other portions need to be coloured green and black. Gel colour pastes are far and away the easiest way to colour anything a really vibrant colour without changing the icings consistency. Here are a couple of links to Amazon but Hobbycraft and cake decorating shops sell them too. Sugarflair green gel paste Sugarflair black extra gel paste colour.
16. Add the coloured icings each to a piping bag. I have fitted piping tips to the bags but it can be done just as easily by snipping off a tiny piece of the end of the bag if you don’t have a multitude of piping tips.
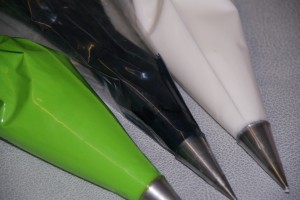
17.Take the white icing and pipe two small balls to the pumpkins face for eye balls. If the icing has little pointy peaks take a slightly damp paintbrush and pat them back down.

18.Using the black royal icing pipe on pumpkin mouths – I’ve done a variety of different styles (because I get bored easily).

Add pupils to the eyes, again patting down any peaks with the damp paintbrush.
19. Now for the pumpkin tops –Squiggly on the green royal icing to make the leafy pumpkin top.
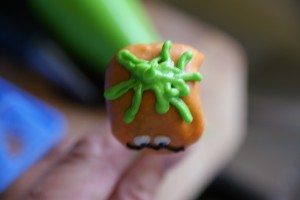
20. Allow the royal icing to set and then your pumpkin cake pops are ready to serve! Cake pops will keep for three days at room temp or upto a week in the fridge. Make sure they are in an airtight container before going in the fridge otherwise they will sweat when you take them out.

xo,
Rach
Credits: Recipe borrowed from The Pink Whisk
http://www.thepinkwhisk.co.uk/



No comments:
Post a Comment
Whatcha thinkin?